
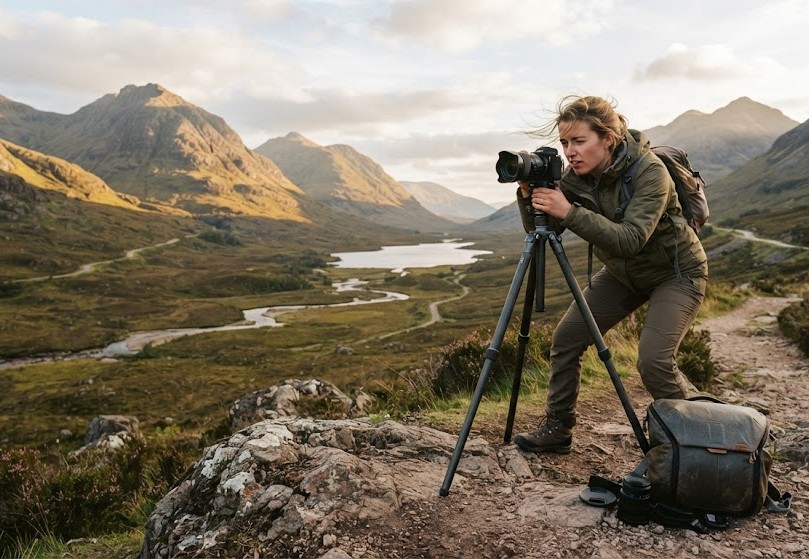
Most travelers take photos when they visit famous landmarks, beautiful landscapes, historic streets, or memorable attractions. However, simply arriving at a photogenic destination does not guarantee great travel photographs. The best images often depend on where you stand, when you arrive, how the light falls, what the weather is doing, and how you compose the scene.
That is where photography-focused travel becomes valuable.
Instead of treating photography as something you do along the way, photography-focused travel makes visual storytelling part of the journey itself. You plan destinations, routes, shooting locations, weather conditions, seasons, and times of day around the photographs you want to create.
In this guide, you’ll learn how to plan a photography-focused trip from start to finish, find better photography locations, choose the right equipment, work with different types of light and weather, use photography planning tools, and turn individual travel photographs into a cohesive visual story.
What Is Photography-Focused Travel?
Photography-focused travel is a style of travel where destinations, activities, timing, and itineraries are intentionally planned around opportunities to create photographs.
Rather than treating photography as an activity that happens after arriving at a destination, you make the visual experience part of the trip itself.
For example, a traditional traveler might visit a mountain viewpoint at noon because it fits conveniently into a sightseeing schedule. A photography traveler, however, may visit before sunrise because the direction of light, clouds, atmosphere, and lower crowds could create stronger photographic conditions.
Photography-focused travel also does not mean spending every minute behind a camera. Instead, it means making intentional decisions about where, when, and how you experience a destination so your photographs can reflect the character of the journey.
The concept can work with almost any travel style. A photographer could plan:
- A road trip around dramatic landscapes
- A city break around architecture and blue hour
- A wildlife trip around animal activity and favorable light
- A cultural trip around festivals and traditions
- A coastal journey around sunrise, sunset, and reflections
- A hiking trip around mountain viewpoints and night skies
The key difference is that photography influences the planning process instead of being an afterthought.
Why Is Photography-Focused Travel Becoming Popular?
Photography-focused travel is becoming increasingly popular because visual content plays an important role in how travelers discover destinations, research experiences, and document their journeys.
Social media platforms have also made photographs and short-form videos an important part of destination discovery. Travel-related posts on TikTok reportedly increased by 410% between 2021 and 2025, while Instagram recorded nearly 2 million travel-related posts in 2024 according to reporting on tourism and social media trends.
Source: Le Monde, 2025.
The growth of international tourism also creates a huge audience for travel photography. International tourist arrivals reached approximately 1.4 billion in 2024, representing a recovery to roughly pre-pandemic levels.
Source: UN Tourism, 2025.
However, photography-focused travel is about more than creating social media content.
It can encourage travelers to slow down and observe their surroundings more carefully. Instead of rushing from one attraction to another, photographers may spend longer at a single location, return at different times, explore quieter streets, or wait for a particular moment.
For example, someone practicing JOMO travel may intentionally avoid crowded attractions and spend an afternoon photographing a quiet neighborhood, local market, scenic walking route, or everyday street life.
How Do You Plan a Photography-Focused Trip?
Planning a photography-focused trip involves researching locations, lighting conditions, weather, seasons, transportation, and the best times of day to photograph each destination.
The goal is not to create an impossibly rigid schedule. Instead, you want an itinerary that places you in the right location at the right time while leaving enough flexibility to respond to changing conditions.
Start by deciding what type of visual story you want to create. A landscape photography trip requires very different research from a street photography trip, while wildlife photography requires different planning again.
1. Research the Destination Before Booking
Before booking your trip, identify the subjects you want to photograph.
Potential subjects include:
- Landscapes
- Architecture
- Wildlife
- People
- Food
- Transportation
- Night scenes
- Local culture
- Street life
- Coastal environments
For example, a mountain destination could provide sunrise landscapes, village portraits, waterfalls, forests, hiking scenes, and night-sky photography.
Researching multiple subjects also makes your itinerary more resilient. If poor weather prevents landscape photography, you may still be able to photograph architecture, local culture, food, interiors, or street scenes.
Seasonal research is equally important.
A location that appears ordinary during one month may look completely different during autumn foliage, monsoon weather, winter snow, or spring blooms. Before booking accommodation and transportation, research how the destination changes throughout the year.
2. Build Your Schedule Around Light
Light is one of the most important elements in travel photography.
Golden hour and blue hour can provide distinctive lighting conditions that add depth, color, atmosphere, and dimensionality to photographs. Golden hour occurs around sunrise and sunset, while blue hour occurs around twilight when the sky takes on deeper blue tones.
Instead of simply asking, “What should I see today?” a photography-focused itinerary asks, “Where should I be when the light is best?”
For example, you could schedule:
- Sunrise: Landscapes, quiet streets, silhouettes
- Morning: Architecture, markets, walking scenes
- Midday: Museums, interiors, food, shaded streets
- Afternoon: Portraits, details, exploration
- Sunset: Landscapes and silhouettes
- Blue hour: Cityscapes, buildings, and illuminated streets
This approach helps you avoid wasting the best natural light while commuting between locations.
At the same time, don’t assume every photograph needs soft golden-hour light. Midday conditions can also be useful for graphic shadows, strong textures, architectural patterns, and high-contrast compositions.
3. Research Weather and Seasonal Conditions
Weather should not automatically be treated as an obstacle. In photography, changing weather can become part of the visual story.
Clouds can add texture to a sky. Rain can create reflections. Fog can introduce atmosphere. Snow can completely transform a familiar landscape.
For example, a rainy evening in a city can turn ordinary streets into reflective surfaces filled with colorful lights.
Because weather is unpredictable, create both Plan A and Plan B locations for important shooting windows.
If clouds block your planned sunrise, you should already know where you can photograph architecture, people, interiors, markets, or street scenes instead.
This flexibility can turn disappointing weather into an unexpected photographic opportunity.
How Do You Find the Best Photography Locations While Traveling?
Finding strong photography locations requires more than searching for the most famous attractions.
The best approach combines:
- Maps
- Visual research
- Local recommendations
- Photography communities
- Travel guides
- On-the-ground scouting
- Your own experimentation
Famous viewpoints can be excellent starting points, but they should not become the entire photography plan.
Mapping tools can help identify viewpoints, trails, bridges, waterfronts, historic districts, rooftops, parks, architectural features, and unusual locations.
Google Maps can help travelers discover places through community recommendations, saved lists, photographs, and location information. Google has also expanded Maps features around curated recommendations and customized travel lists.
Source: Google, 2024.

How Can You Find Unique Photography Spots Beyond Tourist Attractions?
Unique photography opportunities often appear when you explore the areas surrounding famous attractions rather than photographing the attraction itself.
Instead of taking the obvious photograph, search for:
- Secondary viewpoints
- Side streets
- Reflections
- Foreground elements
- Local activity
- Different perspectives
- Framing opportunities
- Interesting shadows
- Unusual architectural details
For example, instead of photographing a famous cathedral straight on, walk several blocks away and frame its tower between buildings. You could also photograph its reflection after rain or capture people moving through the foreground.
These approaches can transform a familiar landmark into a more personal photograph.
underrated European destinations
Local knowledge can also reveal places that do not appear prominently in standard travel guides.
Ask hotel staff, local photographers, guides, hikers, or residents where they enjoy watching sunrise and sunset, attending festivals, or experiencing everyday life.
What Are the Best Types of Photography for Travel?
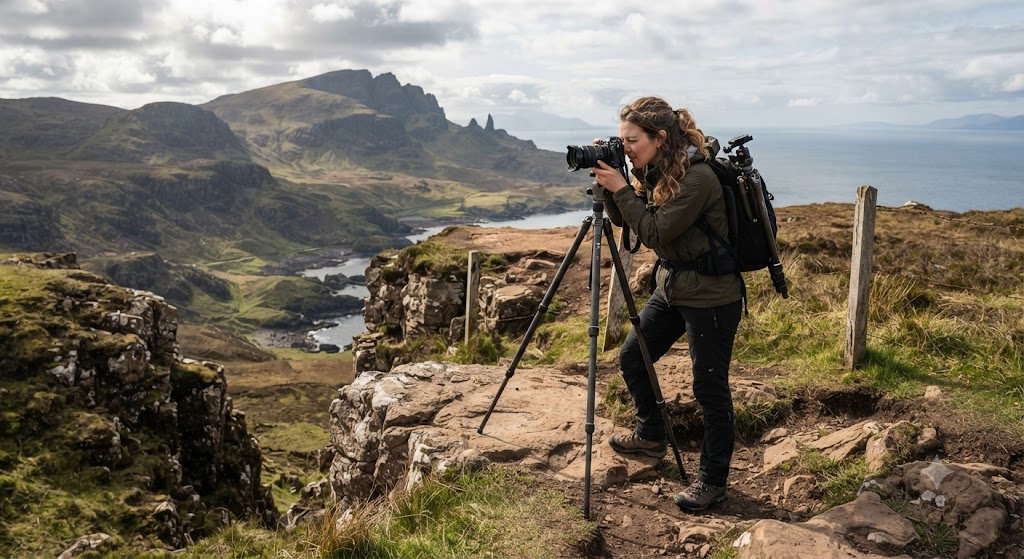
Travel photography includes many different styles, and each style requires different locations, timing, lenses, and techniques.
Choosing a primary photography style before your trip can help you avoid carrying unnecessary equipment and creating an unrealistic itinerary.
| Photography type | Best subjects | Useful approach |
|---|---|---|
| Landscape | Mountains, valleys, waterfalls | Wide perspectives and foregrounds |
| Cityscape | Skylines and streets | Blue hour and elevated viewpoints |
| Architecture | Buildings and interiors | Symmetry, lines, and perspective |
| Wildlife | Animals and birds | Patience and telephoto reach |
| Street | Everyday life | Observation and fast reactions |
| Cultural | Festivals and traditions | Respectful storytelling |
| Astrophotography | Stars and night skies | Dark locations and tripod |
| Beach | Coastlines and waves | Sunrise, sunset, reflections |
| Travel portraits | People and companions | Natural light and environment |
You don’t necessarily have to choose only one style. However, identifying your main priorities makes it easier to decide where to go, when to shoot, and what equipment to bring.
How Can You Photograph People and Local Culture Respectfully?
Cultural travel photography works best when people are treated as participants rather than props.
Ask permission when appropriate, respect local customs, and avoid photographing sensitive situations simply because they appear visually interesting.
For example, if you visit a religious ceremony, learn whether photography is permitted before raising your camera.
Environmental portraits can also tell stronger stories than isolated headshots because the surrounding environment provides context.
A person working in a market, walking through a historic neighborhood, preparing food, or participating in a local tradition can communicate much more about a destination than a posed photograph alone.
What Is the Best Time of Day for Travel Photography?
The best time of day for travel photography depends on your subject, the direction of light, weather, and the mood you want to create.
However, sunrise, sunset, and blue hour often provide particularly useful conditions. Low-angle sunlight can create softer illumination, longer shadows, and stronger dimensionality.
For example:
- Golden hour: Landscapes and portraits
- Blue hour: Cityscapes and architecture
- Early morning: Quiet streets and landscapes
- Midday: Interiors, food, graphic shadows, and shaded locations
- Late afternoon: Portraits, details, and street scenes
- Night: City lights and astrophotography
However, midday should not automatically be avoided.
Harsh sunlight can create strong shadows, dramatic textures, graphic patterns, and high-contrast compositions. Learning to work with difficult light can expand the number of useful shooting opportunities during your trip.
How Does Weather Affect Travel Photography?
Weather changes the appearance of a destination by affecting light, contrast, color, visibility, and atmosphere.
The same location can look completely different under clear skies, clouds, fog, rain, or snow.
For example, fog can simplify a landscape by hiding distracting backgrounds, while storm clouds can make a coastline look more dramatic.
Rain can also create reflections on roads and sidewalks, while clouds can produce more interesting skies than a completely clear day.
That being said, protect your equipment when conditions become wet, dusty, sandy, or extremely cold.
Weather protection should be considered part of photography trip planning, particularly when your itinerary includes outdoor shooting.
How Can You Take Better Landscape Photos While Traveling?
Better landscape photographs come from combining strong composition with thoughtful timing, useful foreground elements, and intentional camera positioning.
A beautiful destination alone does not guarantee a compelling photograph.
One of the first techniques to look for is leading lines. Roads, rivers, fences, trails, bridges, and architectural edges can guide the viewer’s eye toward the main subject.
For example, a winding hiking trail can lead the eye from the foreground toward a mountain in the distance.
Another useful approach is creating depth.
Include foreground, middle-ground, and background elements whenever appropriate. This can make a flat scene feel more three-dimensional and give the viewer a stronger sense of place.
Useful travel landscape photography techniques include:
- Leading lines
- Foreground framing
- Reflections
- Symmetry
- Negative space
- Layering
- Low-angle perspectives
- Silhouettes
- Intentional motion
Importantly, travel photography does not require expensive equipment.
Strong composition, good light, thoughtful timing, and careful observation can have a greater impact on the final photograph than simply purchasing more expensive gear.
What Camera Gear Do You Need for a Photography Trip?
The ideal photography gear for travel depends on the destination, photography style, transportation, and shooting conditions rather than the price of the equipment.
A lightweight setup is often more practical than carrying every lens and accessory you own.
A basic travel photography kit can include:
- Smartphone or camera
- Wide-angle or standard zoom lens
- Telephoto lens when wildlife or distant subjects matter
- Lightweight tripod
- Spare batteries
- Extra memory cards
- Camera bag
- Lens-cleaning cloth
- Weather protection
- Portable storage or backup drive
Your equipment should support the photographs you actually plan to create.
For example, a city photographer may need only a camera with one versatile lens. A wildlife photographer, by comparison, may prioritize a telephoto lens and faster autofocus.
Can You Use a Smartphone for Photography-Focused Travel?
Yes. Smartphones can be highly effective tools for photography-focused travel.
Modern smartphones combine capable cameras, computational photography, editing tools, navigation, and storage in a single portable device.
Globally, 82% of people aged 10 and older owned a mobile phone in 2025, making mobile devices one of the most accessible tools for capturing and sharing visual content.
Source: ITU, 2025.
Smartphones can be particularly useful for:
- Street photography
- Food photography
- Architecture
- Travel portraits
- Everyday moments
- Quick snapshots
- Situations where carrying a dedicated camera is inconvenient
Dedicated cameras still provide advantages for specialized photography, including interchangeable lenses, greater manual control, larger sensors, and improved reach for subjects such as wildlife.
Therefore, the best device is often the one that fits your photography goals, travel style, and willingness to carry equipment.
What Are the Best Apps for Planning a Photography Trip?
The best apps for photography trip planning are those that help combine maps, weather, light, navigation, scouting, and photo organization into a practical workflow.
You do not need dozens of apps. Instead, focus on using a small number of tools that solve specific planning problems.
Useful categories include:
- Maps: Google Maps for locations, routes, saved places, and scouting
- Weather: Weather apps for cloud cover, precipitation, wind, and visibility
- Sun planning: Sunrise, sunset, golden-hour, and sun-position tools
- Navigation: Maps and offline navigation for remote locations
- Planning: Travel itinerary and booking tools
- Editing: Mobile or desktop photo editors
- Organization: Cloud storage and external backups
Google’s travel tools can also help travelers research destinations, create lists, compare options, and build travel plans.
Source: Google, 2024.
The important point is not how many tools you use but how effectively you combine them.
For example, you could save a location in your map, check its sunrise direction, review the forecast the evening before, estimate travel time, and prepare a backup location.
That simple workflow can significantly reduce unnecessary searching during the trip.
What Tools Can Make Photography-Focused Travel Easier?
Photography-focused travel becomes easier when planning tools are used as decision-making aids rather than replacements for observation.
Maps help answer where to go.
Weather services help answer what conditions you may encounter.
Sun-position and light-planning tools help answer when to arrive.
Together, they can make your photography itinerary more efficient.
For example, a photographer can save a sunrise viewpoint in a map, check the forecast the evening before, calculate the sunrise window, and prepare a backup indoor location.
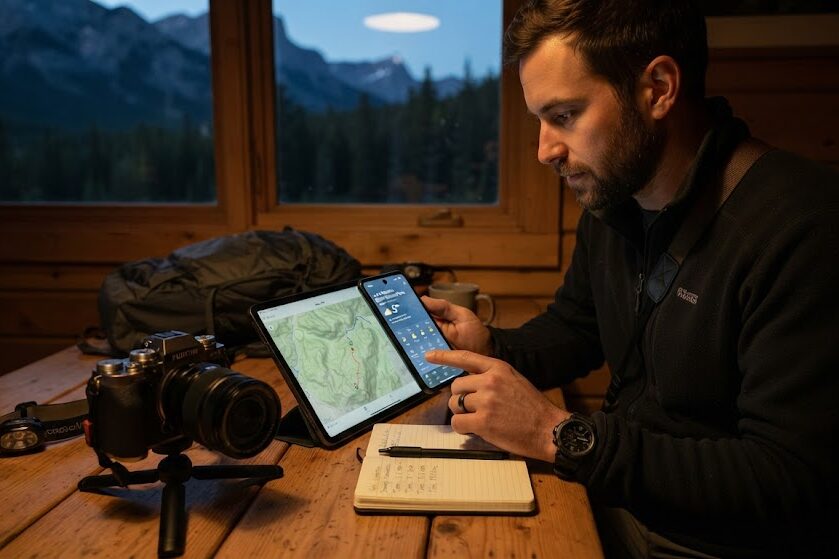
Google Maps is particularly useful for saving locations and organizing potential stops. Visual search tools can also help identify unfamiliar landmarks or locations from photographs.
Google reports that Lens processes nearly 20 billion visual searches each month, demonstrating the scale of modern visual search behavior.
Source: Google, 2024.
These tools can help with research, but they should not replace exploration. Some of the most memorable photographs can come from locations you discover after leaving your planned route.
How Do You Create a Photography-Focused Travel Itinerary?
A photography-focused itinerary should balance planned shooting locations with enough flexibility to respond to changing weather, unexpected lighting, local events, and spontaneous photographic opportunities.
Start by choosing a visual theme for the trip.
Your theme could focus on:
- Mountains
- Architecture
- Local culture
- Coastal landscapes
- Night photography
- Everyday street life
- Wildlife
- Food and markets
Next, identify five to ten priority photography locations instead of trying to photograph everything.
A practical planning framework is:
- Choose one primary visual theme.
- Select the destination.
- Identify 5–10 priority photography locations.
- Research sunrise and sunset direction.
- Check seasonal weather patterns.
- Estimate travel time between locations.
- Schedule your strongest locations around the best light.
- Create backup locations for poor weather.
- Prepare and test your equipment.
- Leave unscheduled time for discoveries.
For example, a three-day city photography trip could dedicate sunrise to historic architecture, midday to museums and cafés, late afternoon to street scenes, and sunset to a skyline viewpoint.
However, avoid filling every hour with photography.
Rest and exploration can improve your photography because slowing down gives you more opportunities to notice details that a rigid schedule might hide.
Some of the strongest images happen when you have enough time to observe rather than constantly rushing toward the next location.
What’s Next: How Do You Build Your Own Photography-Focused Travel Plan?
Building a photography-focused travel plan starts with a visual goal and ends with a flexible shooting schedule.
The best itinerary is specific enough to guide you but flexible enough to respond to real-world conditions.
Use this photography trip checklist:
- Theme: Decide what visual story you want to tell.
- Destination: Choose a place that supports that story.
- Locations: Save five to ten priority spots.
- Light: Research sunrise, sunset, golden hour, and blue hour.
- Weather: Check seasonal patterns and short-term forecasts.
- Gear: Carry only equipment that supports your subjects.
- Transport: Estimate realistic travel and walking times.
- Backups: Prepare alternative locations for poor weather.
- People: Research local photography etiquette.
- Story: Plan a mixture of wide, medium, detail, and human-interest photographs.
For example, a coastal trip could use sunrise for wide landscapes, midday for fishing villages and food, afternoon for portraits, sunset for silhouettes, and blue hour for harbor lights.
Finally, remember that the strongest photography trips are not always the trips with the most famous locations.
A thoughtful visual story can turn an ordinary destination into a memorable photography experience.
How Can You Turn Travel Photos Into a Visual Story?
A travel photo story connects individual images so they communicate a larger experience rather than presenting a random collection of attractive photographs.
Strong visual stories usually combine establishing scenes, people, details, movement, and memorable closing images.
For example, a mountain story could begin with the road approaching the destination. It could continue with a local village, show the hiking journey, capture environmental details, reveal the mountain at sunrise, and finish with the journey home.
A useful visual sequence includes:
- Establishing shot — Where are you?
- Context shot — What does the environment feel like?
- Human moment — Who is experiencing the place?
- Detail shot — What small element tells the story?
- Action shot — What is happening?
- Hero image — What is the strongest visual moment?
- Closing image — How does the journey end?
This approach helps your photographs feel connected instead of repetitive.
It also gives viewers a stronger sense of movement, place, atmosphere, and experience.
Conclusion
Photography-focused travel is a way to design your journey around observation, light, timing, location, composition, and visual storytelling.
Whether you use a professional mirrorless camera, a compact camera, or simply your smartphone, the principles remain similar: understand the destination, plan around the best opportunities, observe your surroundings, and stay flexible.
The best photography trip is rarely the one with the most expensive equipment or the longest checklist. Intentional planning, good light, thoughtful composition, and patience often matter more than owning more gear.
Start with one destination and one visual theme. Identify a handful of priority locations, study their light and seasonal conditions, prepare equipment that matches your subjects, and leave enough room for unexpected moments.
Ultimately, photography-focused travel is not simply about collecting beautiful photographs. It is about experiencing a destination more intentionally and turning that experience into a visual story you can remember long after the journey ends.
FAQs
What is photography-focused travel?
Photography-focused travel means planning a trip around locations, lighting, timing, weather, and opportunities to capture great photographs.
How do you plan a photography-focused trip?
Choose a visual theme, research locations, check lighting and weather, prepare your gear, and create a flexible itinerary.
What is the best time for travel photography?
Sunrise, golden hour, sunset, and blue hour often provide excellent lighting for travel photography.
Can you use a smartphone for photography-focused travel?
Yes, smartphones can capture high-quality travel photos, especially of street scenes, food, architecture, and everyday moments.
What camera gear do you need for a photography trip?
A camera or smartphone, versatile lens, spare batteries, memory cards, tripod, and camera bag are useful for most photography trips.
How do you find unique photography locations?
Use maps, local recommendations, visual research, photography communities, and explore areas beyond popular tourist attractions.
How does weather affect travel photography?
Weather changes light, color, contrast, and atmosphere, creating different photographic opportunities.
What are the best types of travel photography?
Popular types include landscape, architecture, wildlife, street, cultural, cityscape, beach, astrophotography, and travel portraits.
How can you photograph local culture respectfully?
Ask permission when appropriate, respect local customs, and avoid photographing sensitive situations.
Why is composition important in travel photography?
Good composition helps create stronger images through techniques such as leading lines, symmetry, layering, and foreground framing.
How many photography locations should you plan for a trip?
Planning five to ten priority locations provides clear goals while leaving room for flexibility.
Should a photography itinerary be flexible?
Yes, flexibility allows you to adapt to changing weather, lighting, local events, and unexpected photo opportunities.
How do you create a travel photography story?
Combine establishing shots, people, details, action, a hero image, and a closing image to create a connected visual story.