
Building strength doesn’t require expensive gym memberships, complicated machines, or a garage full of equipment. Your body is the most versatile and effective piece of exercise equipment you’ll ever own, capable of providing all the resistance necessary to build impressive strength from the comfort of your home. Whether you’re a complete beginner intimidated by traditional weight training, someone with limited space and budget, or simply prefer the convenience of home workouts, this comprehensive guide will show you exactly how to increase body strength at home using nothing but your bodyweight and determination.
Strength training transforms your body and life in profound ways that extend far beyond aesthetic improvements. Increased strength makes everyday activities easier—carrying groceries, climbing stairs, playing with children, or moving furniture become effortless tasks rather than exhausting challenges. Strength training builds bone density, reduces injury risk, improves posture, enhances athletic performance, boosts metabolism, and supports healthy aging. Perhaps most importantly, the confidence and sense of accomplishment from progressively getting stronger creates positive momentum that extends into every area of your life.
This guide provides everything you need to successfully increase body strength at home through structured, progressive bodyweight training. You’ll learn the fundamental principles of strength development, master the most effective exercises for each major muscle group, understand how to create personalized workout routines that match your current fitness level, and discover strategies for continuous progression that ensure you keep getting stronger week after week. The journey from struggling with basic movements to performing impressive feats of strength begins with understanding that strength is a skill anyone can develop with proper training and consistent practice.
Understanding Strength Development Fundamentals
How Muscles Actually Get Stronger
Strength isn’t about muscle size alone, though the two are related. When you challenge your muscles with resistance they’re not accustomed to, you create microscopic damage to muscle fibers. Your body responds to this stimulus by repairing these fibers and making them stronger to handle similar future stress. This adaptation process is the foundation of all strength training.
Initially, strength gains occur primarily through neuromuscular adaptations—your nervous system becomes more efficient at recruiting muscle fibers and coordinating movement patterns. This is why beginners often see rapid strength improvements without significant muscle growth in the first few weeks. Your muscles are learning to work more effectively, activating more fibers simultaneously and improving coordination between different muscle groups.
As you continue training, muscle hypertrophy—actual growth of muscle tissue—becomes the primary driver of further strength increases. Muscle fibers increase in size and number, providing greater force-generating capacity. This process requires adequate protein intake, sufficient recovery time between workouts, and progressive overload—consistently challenging your muscles with increasing demands.
Understanding these mechanisms is crucial for learning how to increase body strength at home effectively. You’re not just randomly exercising—you’re strategically creating the conditions necessary for your body to adapt by becoming stronger. Every workout represents a stimulus, every rest day allows adaptation, and every proper meal provides building blocks for new muscle tissue.
The Progressive Overload Principle
Progressive overload is the non-negotiable requirement for continued strength gains. If you perform the same workout with the same difficulty month after month, your body has no reason to adapt further. You must consistently increase the challenge through various methods: adding repetitions, increasing exercise difficulty through leverage changes or harder variations, reducing rest periods between sets, slowing down movement tempo to increase time under tension, or adding additional sets.
Without weights, creating progressive overload requires creativity and understanding of biomechanics. A standard push-up becomes easier as you get stronger, so you progress to decline push-ups with feet elevated, then to one-arm push-ups, then to explosive plyometric variations. Each progression provides the increased challenge necessary for continued adaptation.
Track your workouts to ensure progressive overload. Note exercises performed, repetitions completed, and difficulty level. Each week, aim to either add repetitions, progress to harder variations, or reduce rest times. These small, consistent increases compound over weeks and months into dramatic strength improvements.
Recovery and Adaptation
Strength isn’t built during workouts—it’s built during recovery. When you exercise, you create stress and muscle damage. During rest, your body repairs this damage and builds back stronger to handle future stress. Without adequate recovery, you prevent this adaptation process and risk overtraining, injury, and stagnation.
Beginners can train the same muscle groups 2-3 times weekly with full recovery between sessions. More advanced individuals might require additional rest or employ split routines that allow certain muscle groups to recover while training others. Sleep is when most recovery occurs—aim for 7-9 hours nightly to optimize adaptation.
Proper nutrition is equally critical. Protein provides amino acids necessary for muscle repair and growth. Carbohydrates replenish energy stores depleted during training. Healthy fats support hormone production crucial for muscle building. Without adequate nutrition, even perfect training produces minimal results.
1. Mastering Upper Body Pushing Strength
The Push-Up Progression
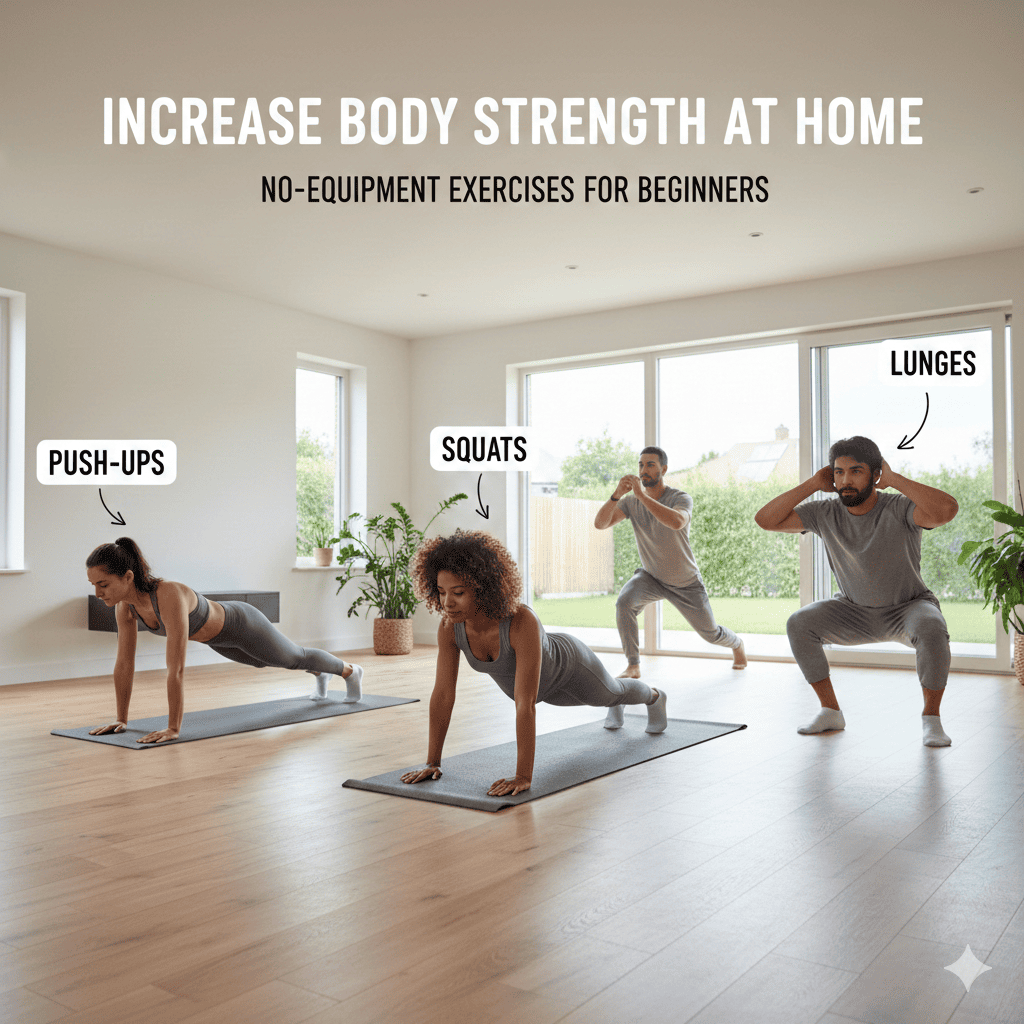
Push-ups are the foundational upper body pushing exercise, developing chest, shoulders, and triceps while challenging core stability. The beauty of push-ups lies in their scalability—they can be modified for complete beginners or progressed to challenge even advanced athletes.
Beginner Level: Wall Push-Ups Stand arm’s length from a wall, place hands on the wall at shoulder height and width. Keep your body straight from head to heels as you bend elbows to bring your chest toward the wall, then push back to starting position. This gentle angle makes the movement accessible to anyone while teaching proper push-up mechanics. Perform 3 sets of 12-15 repetitions, resting 60 seconds between sets.
Intermediate Level: Standard Push-Ups Begin in plank position with hands directly under shoulders, body forming a straight line. Lower your chest to within a few inches of the floor by bending elbows, keeping them at roughly 45 degrees from your body. Push back up to starting position. Focus on controlled movement and full range of motion rather than speed. Work up to 3 sets of 15-20 repetitions.
Advanced Level: Decline and One-Arm Variations Elevate your feet on a chair or step for decline push-ups, increasing load on upper chest and shoulders. Progress to archer push-ups where one arm provides most of the work while the other assists. Eventually work toward true one-arm push-ups—the ultimate bodyweight pressing achievement. Even partial one-arm push-ups represent tremendous strength.
Dip Variations for Triceps
Dips target triceps more directly than push-ups while also engaging chest and shoulders. Using two sturdy chairs or a couch creates an effective dip station.
Chair Dips Sit on the edge of a sturdy chair, place hands beside your hips, slide your bottom off the chair while keeping hands in place. Lower your body by bending elbows to 90 degrees, then press back up. Keep elbows pointing backward rather than flaring out. This effectively isolates triceps and teaches the dipping movement pattern. Begin with 3 sets of 8-12 repetitions.
Elevated Dips Place hands on the edge of a sturdy surface like a countertop or table, walk feet forward so body is angled. Perform dips from this position, which increases difficulty compared to chair dips. Progress to placing hands on two chairs facing away from each other, lowering your body between them for a full dip. This advanced variation requires significant upper body strength and shoulder stability.
These pushing exercises form the foundation for learning how to increase body strength at home in your upper body. Consistent practice with progressive overload transforms weak arms into powerful pressing muscles capable of impressive feats.
Pike Push-Ups for Shoulders
Pike push-ups emphasize shoulder development more than standard push-ups by changing body angle to place more load on deltoids.
Technique Begin in downward dog position with hips high, forming an inverted V with your body. Bend elbows to lower the top of your head toward the floor, then press back up. The key is maintaining the pike position throughout rather than shifting into a standard push-up. This isolates shoulders effectively.
Progress by elevating your feet on a chair or step, increasing the vertical pressing angle. The ultimate progression is the handstand push-up—a vertical press that requires tremendous shoulder strength and balance. Even practicing the inverted position against a wall builds impressive shoulder strength and prepares you for this advanced movement.
2. Building Powerful Pulling Strength
The Pulling Challenge
Pulling movements are more difficult to replicate at home without equipment since gravity works against you in exercises like rows and pull-ups. However, creative solutions allow effective pulling strength development using household items and bodyweight techniques.
Horizontal Rows Using a Table Lie under a sturdy table or desk, grab the edge, and pull your chest to the table while keeping your body straight. Lower with control. This exercise mimics barbell rows and effectively develops back muscles, biceps, and grip strength. The lower you position the table edge relative to your body, the harder the exercise becomes.
Progress by elevating your feet on a chair, creating a more horizontal body position that increases difficulty. Adjust hand width to emphasize different back muscles—wider grip targets upper back, narrower grip emphasizes lats. Work toward 3 sets of 12-15 repetitions with strict form.
Towel Rows Loop a towel or sheet over a sturdy door or attach it to a fixed point. Hold both ends and lean back with straight arms, body at an angle. Pull your chest toward your hands by bending elbows and squeezing shoulder blades together. This simple setup creates an effective rowing movement.
Progress by moving your feet closer to the anchor point, increasing body angle and difficulty. Eventually work toward single-arm rows by holding only one side of the towel. This unilateral work builds tremendous back and arm strength while challenging core stability.
Inverted Row Progressions
If you have access to a sturdy horizontal bar at home—even a broomstick placed across two chairs at appropriate height—inverted rows become possible and highly effective.
Setup and Execution Position the bar at hip height. Lie underneath, grab the bar with overhand grip slightly wider than shoulder-width. Keep body straight and pull your chest to the bar, squeezing shoulder blades together at the top. Lower with control. This movement pattern closely mimics the muscle activation of barbell rows and is excellent for building back thickness.
Progress by lowering the bar height, making your body more horizontal and increasing the percentage of bodyweight you’re lifting. The ultimate progression is a full horizontal row where your body is completely parallel to the ground. This requires significant back strength and full-body tension.
Building Grip and Forearm Strength
Strong pulling requires strong grip. Many people fail pulling exercises not because their back is weak but because their grip gives out first. Targeted grip training eliminates this limitation and supports overall pulling strength development.
Dead Hangs Simply hang from a bar (or even a sturdy door frame if you can find one that supports your weight safely) for time. This builds passive grip strength and prepares your hands for more intense pulling work. Start with holds of 20-30 seconds and progress toward 60+ second hangs.
Towel Hangs Hang from a towel draped over a bar rather than directly gripping the bar. This dramatically increases grip difficulty and builds crushing grip strength. Even short holds of 10-15 seconds challenge your forearms intensely.
These pulling exercises are essential components of any plan to increase body strength at home. Balance between pushing and pulling prevents muscle imbalances and creates comprehensive upper body strength.
3. Developing Lower Body Power
Squats for Complete Leg Development
Squats are the king of lower body exercises, developing quadriceps, hamstrings, glutes, and core while improving mobility and functional strength for everyday activities.
Bodyweight Squat Mastery Stand with feet shoulder-width apart, toes slightly turned out. Lower your hips back and down as if sitting into a chair, keeping your chest up and weight balanced through your entire foot. Descend until thighs are parallel to the floor or deeper if mobility allows. Drive through your heels to stand back up.
Proper form is critical. Keep knees tracking over toes rather than caving inward. Maintain a neutral spine throughout the movement. If you can’t squat to parallel depth, work on ankle and hip mobility while squatting to whatever depth you can achieve with good form. Depth improves with practice.
Begin with 3 sets of 15-20 repetitions. As this becomes easy, progress to harder variations rather than simply adding endless repetitions.
Squat Progressions for Continued Gains
Pulse Squats Lower into your squat position and perform small pulsing movements at the bottom, maintaining constant tension on your muscles. After 10-15 pulses, stand up. This time under tension creates intense muscular challenge despite using only bodyweight.
Jump Squats Perform a regular squat, but explode upward into a jump at the top. Land softly with bent knees and immediately descend into the next squat. This plyometric variation builds explosive power and increases difficulty substantially. Work up to 3 sets of 10-15 repetitions.
Single-Leg Squats (Pistol Squats) The ultimate bodyweight squat variation. Stand on one leg, extend the other leg forward, and lower yourself into a squat on the working leg while keeping the extended leg off the ground. This requires tremendous leg strength, balance, and mobility. Progress toward this gradually through assisted variations using a doorframe or TRX-style strap for support.
Lunges and Split Squats
Lunges and split squats work legs unilaterally, creating more balanced strength while challenging stability and coordination.
Forward Lunges Step forward with one leg, lowering your back knee toward the floor while keeping your front shin relatively vertical. Push back to starting position and repeat with the other leg. This movement builds leg strength while improving balance and hip mobility. Perform 3 sets of 10-12 lunges per leg.
Bulgarian Split Squats Place your rear foot on a chair or step behind you, then lower into a lunge position on the front leg. This elevated rear foot position increases range of motion and places more load on the working leg. Bulgarian split squats are among the most effective single-leg exercises for building strength and muscle.
Progress by slowing down the tempo—take 3-4 seconds to lower, pause at the bottom, then drive up. This increased time under tension creates greater stimulus despite using only bodyweight. Eventually work toward elevated single-leg squats where the front foot is also elevated, increasing range of motion further.
Glute and Hamstring Development
While squats and lunges work glutes and hamstrings, targeted exercises ensure complete posterior chain development.
Glute Bridges Lie on your back with knees bent and feet flat on the floor. Lift your hips toward the ceiling by squeezing your glutes, creating a straight line from knees to shoulders. Hold at the top for 2 seconds, squeezing glutes hard, then lower with control. This isolates glutes and teaches proper hip extension—crucial for athletic performance and injury prevention.
Progress to single-leg glute bridges by extending one leg straight while bridging on the other. This unilateral variation requires significant stability and strength. Work toward 3 sets of 15 reps per leg.
Nordic Curls (Assisted) Kneel on a soft surface with feet anchored (have a partner hold them or hook them under heavy furniture). Slowly lower your torso forward by resisting with your hamstrings, controlling the descent as long as possible before catching yourself with your hands. Push back up to starting position using your hands as needed.
Even partial Nordic curls build remarkable hamstring strength. Over time, control a longer descent before needing to catch yourself. This eccentric-focused exercise is one of the most effective hamstring developers possible.
These lower body exercises teach you exactly how to increase body strength at home in your legs without requiring weights. Consistent progressive training builds legs capable of impressive power and endurance.
4. Core Strength and Stability
Understanding Core Function
Your core isn’t just abdominal muscles—it’s the entire muscular system stabilizing your spine and transferring force between your upper and lower body. A strong core improves performance in all exercises, supports healthy posture, reduces back pain, and enhances everyday function.
Core training should emphasize stability and anti-movement rather than endless crunches. Your core’s primary function is preventing unwanted movement—resisting rotation, lateral flexion, and spinal extension while maintaining neutral alignment. Training that emphasizes these functions builds practical, functional core strength.
Plank Progressions
Planks are the fundamental core stability exercise, teaching your core to maintain neutral spine position under load.
Standard Plank Position yourself on forearms and toes, body forming a straight line from head to heels. Engage your core by pulling your belly button toward your spine and squeezing your glutes. Maintain this position without allowing hips to sag or pike upward. Start with holds of 30 seconds and gradually work toward 60-90 seconds.
Plank Variations for Progression Once standard planks become easy, increase difficulty through variations. Extend one arm forward for three-point planks. Lift one foot off the ground for added instability. Perform shoulder taps—from plank position, tap opposite shoulder with alternating hands while maintaining stable hips.
Side planks target obliques and lateral core stability. Lie on your side, prop yourself on one forearm, stack your feet, and lift your hips to create a straight line. Hold this position, resisting the urge to let hips sag. Work up to 45-60 second holds per side.
Anti-Rotation Exercises
Teaching your core to resist rotation builds practical strength for sports and daily activities while creating a defined, athletic midsection.
Pallof Press (Bodyweight Version) Attach a resistance band to a fixed point at chest height (or use a partner holding a towel). Stand perpendicular to the anchor point, hold the band at your chest, then press it straight out. The tension tries to rotate your torso toward the anchor—resist this rotation by keeping shoulders square. This anti-rotation challenge intensely engages obliques and deep core muscles.
Dead Bugs Lie on your back, extend arms toward ceiling, bring knees up to 90 degrees. Slowly extend opposite arm and leg simultaneously while maintaining contact between your lower back and the floor. Return to starting position and alternate sides. This seemingly simple exercise intensely challenges core stability when performed with proper form and tempo.
Dynamic Core Movements
While stability exercises form your foundation, dynamic movements add additional strength and functionality.
Mountain Climbers From plank position, drive one knee toward your chest, then quickly switch legs in a running motion. Maintain a strong plank position throughout—don’t allow hips to pike or sag. This combines core stability with cardiovascular challenge and hip flexor strength. Perform for 30-60 seconds as a metabolic finisher or integrate into circuits.
Bicycle Crunches Lie on back, bring opposite elbow to opposite knee while extending the other leg, alternate in a pedaling motion. Focus on rotation from your torso rather than yanking on your neck. This effectively engages all abdominal muscles while challenging coordination and endurance.
Leg Raises Lie on your back, keep legs straight, and lift them to vertical position, then lower with control without touching the floor. This intensely works lower abdominals and hip flexors. If too difficult, bend knees slightly or reduce range of motion. Progress toward full straight-leg raises with controlled tempo.
Building comprehensive core strength is essential when learning how to increase body strength at home. A strong core supports and enhances all other strength training while creating the foundation for advanced bodyweight movements.
5. Creating Effective Workout Routines
Full-Body Versus Split Training
For beginners aiming to increase body strength at home, full-body workouts 2-3 times weekly provide optimal stimulus with adequate recovery. Training all major muscle groups each session ensures balanced development while allowing sufficient rest between workouts.
Sample Full-Body Workout
- Push-ups: 3 sets to near-failure
- Inverted rows or towel rows: 3 sets of 10-12 reps
- Bodyweight squats: 3 sets of 15-20 reps
- Glute bridges: 3 sets of 15 reps
- Plank: 3 sets of 30-60 seconds
- Rest 90-120 seconds between sets
Perform this workout Monday, Wednesday, and Friday, allowing full recovery between sessions. Progress by adding repetitions, advancing to harder exercise variations, or reducing rest periods.
As you advance, split routines become viable—dedicating specific days to upper body, lower body, or push/pull/legs divisions. This allows higher volume per muscle group while maintaining adequate recovery. However, beginners benefit most from full-body approaches that teach fundamental movement patterns while building overall strength.
Progressive Weekly Structure
Structure your training week to balance intensity with recovery. Don’t make every workout maximally difficult—strategic variation in intensity allows you to train consistently without burning out.
Week 1:
- Monday: Full-body workout (moderate intensity)
- Wednesday: Full-body workout (high intensity)
- Friday: Full-body workout (moderate intensity)
Week 2:
- Monday: Full-body workout (high intensity)
- Wednesday: Full-body workout (moderate intensity)
- Friday: Full-body workout (high intensity)
Moderate intensity means performing exercises to near failure—stopping when you could do 1-2 more reps with good form. High intensity means training to complete failure—the point where you cannot complete another repetition. Alternating these intensities prevents overtraining while ensuring consistent progressive stimulus.
Tracking and Measuring Progress
Systematic tracking is essential for continued improvement. Record every workout noting exercises, sets, repetitions, and difficulty variations used. This data reveals progress patterns and ensures progressive overload.
Metrics to Track:
- Maximum repetitions for key exercises
- Exercise variations you can perform
- Rest times between sets
- Time required to complete workouts
- Bodyweight and body measurements
- Energy levels and perceived difficulty
Review this data weekly to plan progressive increases. If you performed 12 push-ups last week, aim for 13 this week. If standard squats became too easy, progress to pulse squats or jump squats. These incremental improvements compound into dramatic strength gains over months.
Take progress photos monthly. Visual changes often precede strength metrics and provide powerful motivation. Many people don’t realize how much stronger they’ve become until seeing side-by-side comparisons.
6. Nutrition for Strength Building
Protein Requirements
Adequate protein intake is non-negotiable for building strength. Protein provides amino acids necessary for muscle repair and growth. Without sufficient protein, even perfect training produces minimal results.
Aim for 0.7-1.0 grams of protein per pound of body weight daily. A 150-pound person should consume 105-150 grams of protein. Distribute this throughout the day—consuming 25-40 grams per meal optimizes muscle protein synthesis.
Quality Protein Sources:
- Chicken, turkey, and lean beef
- Fish and seafood
- Eggs and egg whites
- Greek yogurt and cottage cheese
- Protein powder (whey, casein, or plant-based)
- Legumes, beans, and lentils
- Tofu and tempeh
Prioritize whole food protein sources, using supplements only to conveniently meet targets when whole foods aren’t practical.
Caloric and Macronutrient Balance
Building strength requires adequate calories—your body needs energy to fuel workouts and build new muscle tissue. Attempting to increase body strength at home while severely restricting calories produces disappointing results.
Eat at maintenance calories or a slight surplus (200-300 calories above maintenance) to optimize strength gains. Dramatic caloric surpluses aren’t necessary and primarily lead to fat gain rather than accelerated muscle building.
Beyond protein, consume adequate carbohydrates to fuel training. Carbs provide immediate energy for intense workouts and replenish muscle glycogen depleted during training. Include healthy fats to support hormone production—testosterone and growth hormone are crucial for muscle building and require dietary fat for optimal production.
A reasonable macronutrient distribution for strength building:
- Protein: 25-30% of calories
- Carbohydrates: 45-55% of calories
- Fats: 20-30% of calories
Adjust based on personal preference and response. Some people perform better with higher carb intake; others with more fat. Experiment to find what supports your energy levels and strength gains.
Strategic Nutrient Timing
While overall daily intake matters most, strategic timing enhances results. Consume protein and carbohydrates within two hours after training to support recovery and muscle building. This doesn’t require special post-workout supplements—a balanced meal with chicken, rice, and vegetables provides everything necessary.
If training early morning, eating beforehand might feel uncomfortable. This is fine—training fasted is acceptable for moderate-intensity strength workouts. However, ensure you eat a substantial post-workout meal to support recovery.
Stay consistently hydrated throughout the day. Dehydration impairs strength performance, recovery, and muscle building. Drink water steadily, aiming for pale yellow urine as a hydration indicator.
7. Overcoming Plateaus and Continuing Progress
Recognizing Plateaus
Progress isn’t linear. After initial rapid gains, improvements slow. This is normal adaptation—as you become stronger, creating sufficient stimulus for further adaptation requires more strategic programming. Don’t interpret slowing progress as failure or inability to improve further.
A true plateau means zero progress for 3-4 weeks despite consistent training and progressive overload attempts. Before concluding you’ve plateaued, ensure you’re actually applying progressive overload, recovering adequately, and eating appropriately. Most perceived plateaus result from these fundamental errors rather than genuine physiological limits.
Strategies for Breaking Through
Deload Weeks Every 6-8 weeks, reduce training volume by 40-50% for one week. Perform the same exercises but with fewer sets and stopping well short of failure. This recovery week allows accumulated fatigue to dissipate, allowing you to return to normal training refreshed and often significantly stronger.
Exercise Variation If stuck on push-ups, temporarily switch to different variations—diamond push-ups, archer push-ups, or decline variations. This novel stimulus often triggers new adaptations. Return to standard push-ups after a few weeks and you’ll likely find them easier.
Volume and Intensity Manipulation If you’ve focused on high-intensity, low-repetition work, switch to higher repetition sets with moderate intensity. If you’ve done high-volume training, reduce volume and increase intensity. These variations create different adaptive stimuli and often restart progress.
Address Weak Points Often progress stalls because a specific muscle or movement pattern is disproportionately weak. If your push-up progress has stopped, maybe weak triceps are the limiting factor. Add tricep-specific work to address this weakness, and total push-up strength improves.
Long-Term Progression Planning
Think in months and years, not days and weeks. Building impressive strength is a marathon, not a sprint. Celebrate incremental progress while maintaining perspective on the longer journey. The person you’ll be a year from now is determined by the consistency and strategic training you apply today.
Set both short-term and long-term strength goals. Short-term goals might include adding five repetitions to your max push-ups or holding a plank for 90 seconds. Long-term goals might include achieving 20 consecutive pull-ups, performing pistol squats on both legs, or holding a 3-minute plank. These goals provide direction and motivation while marking the milestones on your strength journey.
Your Strength Journey Begins Today
You now possess comprehensive knowledge of how to increase body strength at home through strategic bodyweight training. You understand the physiological principles underlying strength development, have learned specific exercises for every major muscle group, know how to structure effective workouts, understand nutritional requirements, and have strategies for breaking through inevitable plateaus.
The difference between this knowledge and actual strength gains is action. Reading about push-ups doesn’t make you stronger—performing them consistently with progressive challenge does. Understanding protein requirements doesn’t build muscle—eating adequate protein while training hard does. Knowledge provides the roadmap, but you must walk the path.
Start today with a single workout. Choose exercises from each category—an upper body push, an upper body pull, a lower body movement, and a core exercise. Perform 2-3 sets of each, focusing on perfect form rather than rushing through repetitions. This first workout won’t transform your body, but it starts the process.
Then do it again three days later. And again three days after that. Week after week, month after month. Each workout builds on the previous one. Each rest day allows your body to adapt and grow stronger. Each proper meal provides building blocks for new muscle tissue. These consistent small actions compound into dramatic transformation.
Six months from now, you could be remarkably stronger than you are today. You could perform exercises that currently seem impossible. You could move through daily life with a sense of physical capability and confidence that comes only from genuine strength. Or you could still be at the same strength level, still thinking about starting that training program you’ve been meaning to begin.
The choice is entirely yours. The exercises are proven. The principles are sound. Your body is ready. The only remaining question is whether you’ll commit to the consistent action necessary to increase body strength at home and transform your physical capabilities. Make today the day you begin building the strong, capable body you deserve.
Also read this:
8 Best Morning Exercises to Boost Metabolism and Burn Calories All Day
12 Simple Weight Loss Techniques That Actually Work Long-Term (Backed by Science)
Beginner Running Guide: How to Start Running with Zero Experience in Just 14 Days